

Your siding is quietly collecting algae, mildew, and grime every season. Left untreated, that biological growth does more than look bad. It eats into your siding material, shortens its lifespan, and can void manufacturer warranties. This soft wash house siding guide walks you through exactly what soft washing is, what you need to do it safely, and how to get results that last. Whether you are considering a DIY approach or trying to understand what a professional does, this guide gives you the full picture.
Key takeaways
| Point | Details |
|---|---|
| Soft washing uses low pressure | Systems operate under 500 PSI, relying on chemistry rather than force to clean siding safely. |
| Sodium hypochlorite is the active ingredient | Diluted correctly, it kills mould, algae, and mildew without damaging your siding surface. |
| Preparation protects your property | Pre-wetting plants and covering surfaces before applying solution prevents chemical damage to landscaping. |
| Dwell time does the real work | Allowing the cleaning solution to sit on the surface is what neutralises organic growth effectively. |
| Regular maintenance extends siding life | Soft washing every one to three years prevents biological buildup that compromises siding integrity over time. |
What you need for soft wash house siding
Before you apply a single drop of cleaning solution, you need the right equipment. The difference between soft washing and pressure washing starts with the tools. Soft wash systems operate at low pressure, under 500 PSI, while standard pressure washers run between 1,500 and 4,000 PSI or more. That pressure gap is the entire reason soft washing is safe for vinyl, wood, and fibre cement siding where pressure washing is not.
Here is a breakdown of what you will need:
Soft wash equipment vs. pressure washing tools
| Equipment | Soft washing | Pressure washing |
|---|---|---|
| Operating pressure | Under 500 PSI | 1,500 to 4,000+ PSI |
| Cleaning agent | Sodium hypochlorite and surfactant mix | Water only or mild detergent |
| Nozzle type | Wide fan, low-pressure tip | Variable high-pressure tips |
| Risk to siding | Minimal when used correctly | High risk of water intrusion and surface damage |
| Best for | Organic growth, algae, mildew, grime | Hard surfaces like concrete and brick |
For the cleaning solution, professionals use 12.5% sodium hypochlorite as their base, diluted down to between 1% and 5% depending on the material being cleaned. For vinyl siding, a 1 to 2% dilution is generally appropriate. You will also need a surfactant. Surfactants act as wetting agents that allow the solution to cling to vertical siding surfaces and penetrate organic stains rather than running straight off.
For personal protective equipment, you need chemical-resistant gloves, eye protection or a face shield, and old clothing that covers your skin fully. Do not skip this step. Sodium hypochlorite at working concentrations will irritate skin and eyes on contact.
Additional tools worth having on hand include a garden hose with good flow for pre-wetting and rinsing, a soft-bristle brush for stubborn spots, and a stable ladder if you are cleaning above the ground floor. Keep a bucket of clean water nearby for immediate rinsing if solution contacts skin or unintended surfaces.
Pro Tip: Buy your sodium hypochlorite from a pool supply store rather than a grocery store. Pool-grade sodium hypochlorite is typically 10 to 12.5% concentration, which gives you far more control over dilution ratios than household bleach at 3 to 6%.
How to soft wash siding step by step
The soft wash process follows a clear sequence: pre-inspection, protection, chemical application, dwell time, rinse, and post-inspection. Skipping any step reduces effectiveness or risks damage. Here is how to work through each stage properly.
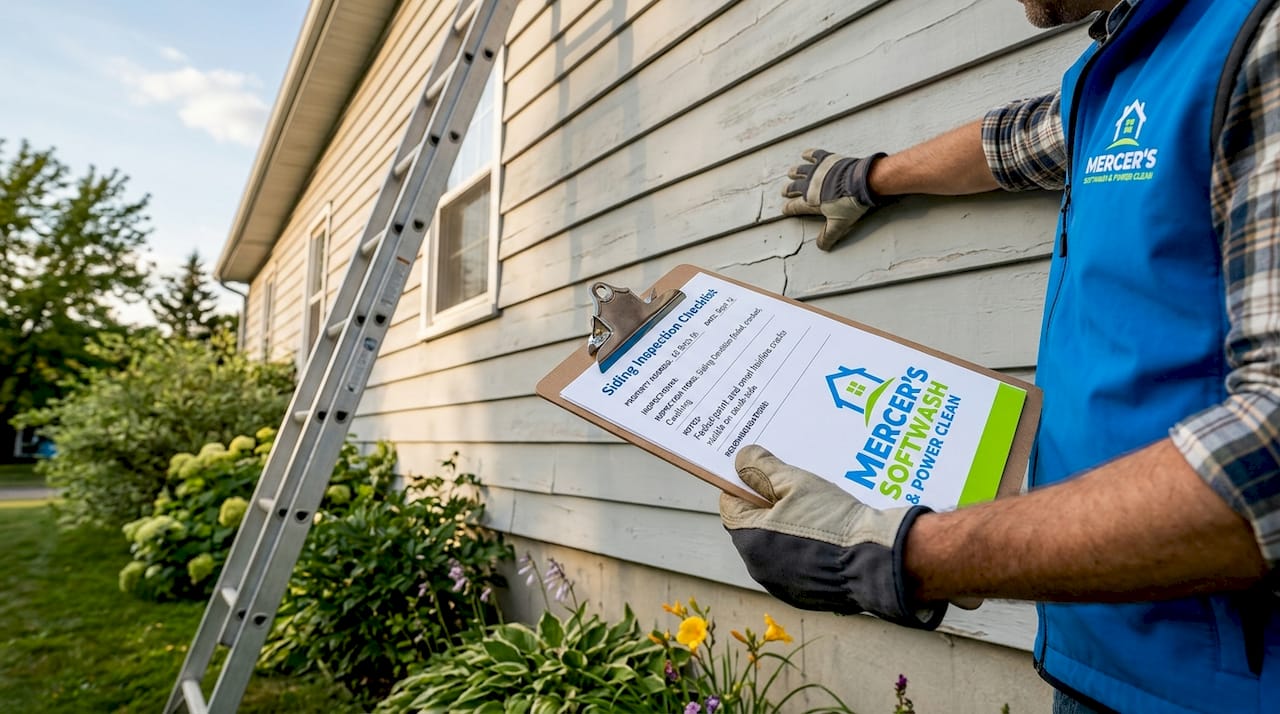
Step 1: Inspect the surface. Walk the entire perimeter of your home and look for cracks, gaps, or damaged panels. Water forced into even a small gap can cause rot and mould inside your wall cavity. Repair any damage before you begin, and seal gaps around windows and doors with painter’s tape if needed.
Step 2: Protect your surroundings. Cover garden beds, shrubs, and any plants near the house with plastic sheeting. Pre-wet all vegetation thoroughly with clean water before applying any cleaning solution. Saturated plants absorb less chemical if overspray reaches them.
Step 3: Mix your cleaning solution. In a dedicated chemical-resistant container, combine your diluted sodium hypochlorite with water and a small amount of surfactant. For vinyl siding, a 1 to 2% sodium hypochlorite solution with roughly 1 to 2% surfactant by volume is a reliable starting point. Always add chemical to water, not water to chemical, to reduce splashing risk.
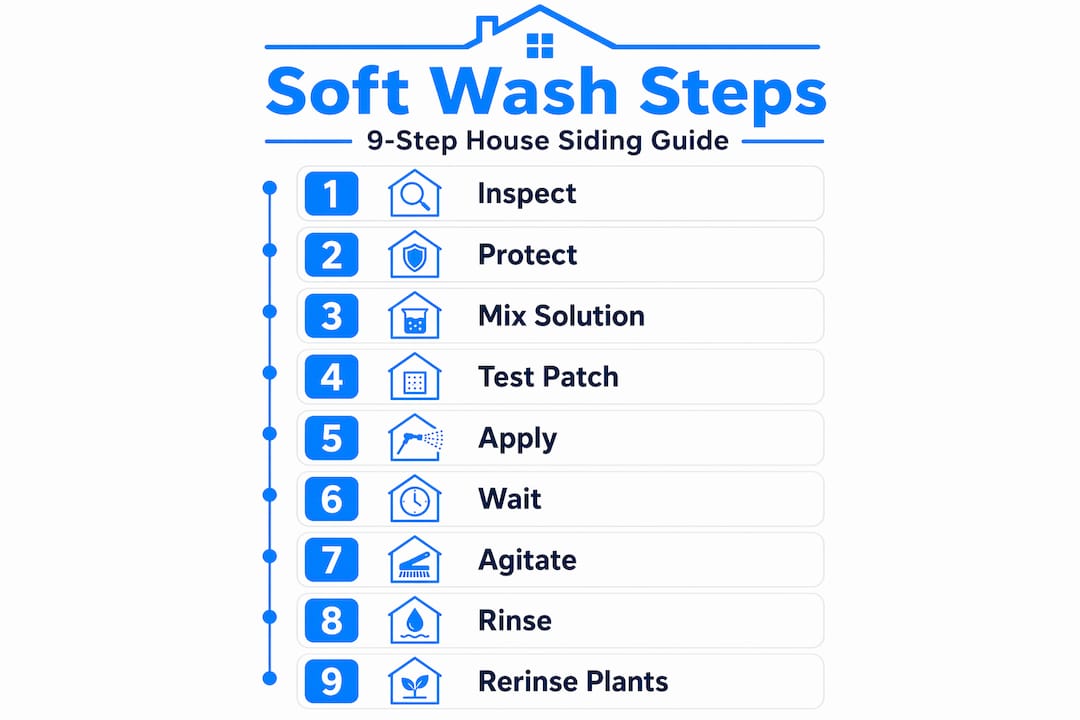
Step 4: Test in an inconspicuous area. Apply a small amount of solution to a hidden section of siding, such as behind a downspout or near the back of the house. Wait five minutes and rinse. Check for discolouration or surface reaction before proceeding.
Step 5: Apply the solution. Using your low-pressure sprayer, apply the solution from the bottom of each wall section upward. This prevents streaking from solution running down over unwashed areas. Work in sections of roughly three to four metres at a time.
Step 6: Allow dwell time. This is where soft washing effectiveness actually comes from. The chemistry needs time to neutralise organic growth. Five to ten minutes is typically sufficient for most siding surfaces. Do not allow the solution to dry on the surface. If it starts to dry in warm or windy conditions, mist lightly with water to keep it active.
Step 7: Agitate stubborn spots. For areas with heavy staining or thick algae, use a soft-bristle brush to gently work the solution into the surface. Avoid scrubbing aggressively. The chemistry is doing most of the work.
Step 8: Rinse thoroughly. Rinse from top to bottom using your garden hose or low-pressure rinse setting. Work methodically so no solution is left behind. Pay close attention to overlapping panel edges and window trim where solution can pool.
Step 9: Post-rinse vegetation. After rinsing the siding, go back and rinse all plants and ground cover again with clean water. This removes any residual chemical that settled during the cleaning process.
Pro Tip: Work on an overcast day when temperatures are between 10°C and 25°C. Direct sun accelerates drying and reduces dwell time, which means the solution does less work before you need to rinse.
Common mistakes when soft washing siding
Even with the right equipment and a clear process, there are several errors that reduce results or cause real damage to your siding. Understanding these before you start will save you time and money.
Using too much pressure is the most common mistake. High-pressure wands can force water behind siding panels, leading to moisture problems and structural damage inside your walls. If you are using a pressure washer with a soft wash nozzle, confirm the output pressure is genuinely below 500 PSI before you begin.
Getting the chemical ratio wrong creates two different problems. Too little sodium hypochlorite means the solution will not kill the organic growth, and you will see results fade within weeks. Too much increases the risk of surface damage, discolouration, and harm to plants. Always measure your ratios rather than estimating.
Skipping plant protection is a mistake that homeowners often regret. Even diluted sodium hypochlorite will damage or kill plants if it contacts roots or foliage in concentration. Pre-wetting and post-rinsing vegetation is not optional. It is a required part of the process.
Allowing soft wash solutions to dry on siding or plants is another frequent error. Once the solution dries, it can leave residue on siding and cause chemical burns on plant leaves. Monitor your dwell time closely, especially on warm or breezy days.
Incomplete rinsing is subtle but damaging over time. Sodium hypochlorite residue left on siding can cause oxidation and surface degradation. Rinse each section completely before moving on, and do a final full-perimeter rinse at the end.
Finally, skipping the test patch is a shortcut that sometimes leads to visible damage across a large area. Different siding materials and paint types respond differently to cleaning solutions. A five-minute test on a hidden area costs nothing and prevents costly mistakes.
Maintenance and expected results
After a proper soft wash, your siding should look noticeably cleaner within hours as the solution neutralises biological growth and it begins to rinse away. Algae and mildew staining will fade significantly, and in most cases completely, within 24 to 48 hours as the residual chemistry continues to work.
For most homes in Southern Ontario and similar climates, soft washing siding every one to three years is sufficient to prevent significant biological buildup. Homes with heavy tree coverage, north-facing walls, or high humidity exposure may need attention on the shorter end of that range. Biological growth actively damages roofing and siding materials if left untreated, so regular maintenance is genuinely structural, not just cosmetic.
To slow future growth between washes, keep gutters clean and free-flowing so water does not run down siding repeatedly. Trim back tree branches and shrubs that hold moisture against the siding surface. Good airflow across your exterior is one of the most effective ways to reduce algae and mildew recurrence.
The benefits of regular siding care and maintenance go beyond appearance. Clean siding is easier to inspect for damage, and removing biological growth preserves the surface coating that protects the underlying material. Many vinyl and fibre cement siding manufacturers include maintenance requirements in their warranty terms, and neglecting cleaning can affect coverage.
If you notice siding panels that are warped, cracked, or showing signs of water intrusion after cleaning, those are repairs that need attention before the next wash cycle. Soft washing a compromised surface without addressing the underlying damage will not solve the structural issue.
My honest take on soft washing siding
I have seen a lot of siding over the years, and the homes that hold up best are the ones where the owners treat exterior cleaning as maintenance rather than a reaction to visible dirt. Most people wait until their siding looks obviously green or grey before they act. By that point, the biological growth has often been working on the surface for a full season or more.
What surprises homeowners most is that soft washing relies on chemistry, not pressure. People assume more force equals more clean. The reality is that a properly mixed solution at low pressure outperforms a high-pressure wash every time for organic growth, and it does so without the risk of stripping paint or damaging vinyl.
The DIY approach is genuinely achievable for one-storey homes with straightforward siding. Where I see homeowners run into trouble is on multi-storey homes, heavily stained surfaces, or when they underestimate the importance of correct chemical ratios. Getting the dilution wrong is not just ineffective. It can be expensive to fix.
My advice is this: if you are comfortable with the process and your home is manageable from the ground or a stable ladder, give it a try. If the job involves significant height, heavy staining, or you are unsure about chemical handling, bring in a professional. The cost of a proper soft wash is almost always less than the cost of repairing siding damage from a job done incorrectly.
— Felix
Let Mercerssoftwashpowerclean handle it for you
If this guide has shown you that soft washing is more involved than it first appears, you are not alone in that conclusion. Mercerssoftwashpowerclean provides professional house soft washing services for homeowners across Southern Ontario, using professional-grade equipment and properly mixed solutions to clean siding safely and thoroughly. The team also handles roof washing and a full range of residential exterior cleaning, so your entire property gets the same level of care. If you want results without the risk of doing it yourself, reach out to Mercerssoftwashpowerclean for a quote.
FAQ
What pressure should I use to soft wash siding?
Soft washing should be done at under 500 PSI. Standard pressure washers operate at 1,500 to 4,000 PSI, which is high enough to force water behind siding panels and cause structural damage.
How often should I soft wash my house siding?
For most homes in Canada, soft washing siding every one to three years is sufficient. Homes with heavy shade, north-facing walls, or high humidity may need cleaning more frequently to prevent biological buildup.
Can I soft wash vinyl siding myself?
Yes, soft washing vinyl siding is a manageable DIY project for single-storey homes. You need a low-pressure sprayer, a correctly diluted sodium hypochlorite and surfactant solution, and proper protective equipment.
What is the difference between soft washing and pressure washing for siding?
Soft washing uses low pressure and chemical solutions to kill and remove organic growth. Pressure washing uses mechanical force, which can damage vinyl siding, strip paint, and push water behind panels.
How long does soft washing take to show results?
Most siding looks noticeably cleaner immediately after rinsing. Algae and mildew staining continues to fade over the following 24 to 48 hours as the residual sodium hypochlorite finishes neutralising the organic material.
Recommended
- How Often Should You Wash Your House Exterior In Port Hope? – Mercer’s Softwash & Power Clean Inc. | Pressure Washing Service
- Roof Washing Service – Mercer’s Softwash & Power Clean Inc. | Pressure Washing Service
- House Power Washing – Mercer’s Softwash & Power Clean Inc. | Pressure Washing Service
- Best House Exterior Power Washing Company Near Me In Port Hope: What To Look For – Mercer’s Softwash & Power Clean Inc. | Pressure Washing Service


